Design

So after doing some research, I was now ready to begin the planning stage. I should point out, that this was probably the most frustrating phase for me. After reading several texts on design and construction, I was eager to begin the actual work -- putting up walls, running wire, etc. However, no work could actually begin before the details of the layout were solidified.
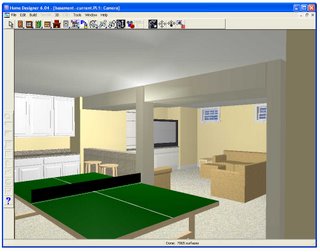
I decided to purchase a design tool, so I could experiment with different basement layouts before starting the work. Home Designer 6.0 from Better Homes and Gardens was the choice. The cost was about $60, and it was WELL worth it. The tool not only allows you to create walls, but it gives you the ability to place furniture/fixtures, as well as view the design in 3D.

The first step was to take dimensions of the basement. Taking these measurements, I transcribed the outside wall-plan with the design tool. The next step was to determine how the space should be used -- the layout of the rooms, function of the rooms, etc.
The unfinished basement was as follows:
- The basement was a walk-up (door with stairway leading outside)
- It was pre-plumbed for a bathroom, with a roughed-in shower drain and toilet drain.
- A roughed-in drain for a sink (presumably a wet-bar) in the middle of the floor. Given this information.
- The bathroom rough-ins were adjacent to the external door
- The HVAC are placed practically at the base of the stairs
- TV Room
- Bar/Kitchen
- Bathroom/Shower
- Exercise Room
- Storage
- PingPong/Pool
- Play Area (Jackson)


0 Comments:
Post a Comment
<< Home