Monday, August 14, 2006

Drywall

As I said earlier, I had decided to contract out the drywall work -- it was pretty messy work, and also took a lot of time. Another factor was that it takes a while to master the 'art' of drywall finishing.

At the end of July, I was ready to call Ricky and get him and his guys to come over to hang and finish the drywall. I obtained the supplies and they came over to do the work. He charged me $19/sheet.

I decided to use Durarock for the shower area, and green-board for the rest of the bathroom (i think they just use greenboard in the shower normally, but all the docs said to use cement-board for showers). We ended up using 91 sheets of drywall (4x8), and about 4-5 of the cement-board (3x5). The drywall and supplies (drywall mud, tape, etc) was about $1100. The labor for hanging/finishing was about $1850. This put the current cost then at $8755

Images below:


Inspections and Insulation

Forgot to mention, as of July, ready to have an electric inspection. I failed the first time through for some minor issues -- they required an outlet to be within 6' of any door on BOTH sides, so i had to add a couple of outlets (rather than move existing ones). Also, when the inspector came, I hadn't put the plates back on the recessed lights (thought he would want to see that). So, made the changes, and passed the next time through.

The basement walls were already insulated. The builder tacked on insulation directly to the contrete outer wall, by using plastic casing. So, really no need for more insulation. I did add a narrow layer at the top of the walls where it was thin (or didn't completely covered by what was there).

The framing inspection was without incident, since there were no load-bearing walls.

For cost, I purchased 2 rolls of the insulation batts. Also used some ceiling tiles for fire-stopping (required by loudoun county, fills the gaps in the ceiling between the outer-wall, and the frame wall). This and a couple of other things came out to about $100. Also, for DirectTV, paid the $120 upgrade to HD. Also had to pay the "free installation" of $80 for some custom work running the cable into the basement, and for the multi-switch. I probably could of done this myself, but didn't want to waste the time. This brought the grand-total to about $5805

Data, Video, Phone

After Electric, the final step before drywalling was to put in the other cable -- video, data, and phone. My existing service in the house is a bit complex. As part of my HOA, I HAVE to subscribe to this neighborhood service, which provides video/data/phone. I can't quit per the HOA contract. I coudl probabl fill up the entire blog with comments on why i don't like this, but this is a blog about my basement, so i'll stick to what's relevant. From this service (Openband) i have an RG6 video service to the house, fiber data connection (why they didn't choose to push the video through this is beyond my comprehension), and phone. However, their video doesn't offer the NFL package, so i grudgingly continued to get DirectTV.

that means I had to run the following cables:
- phone
- data
- video DirectTV
- video Cable
- surround speaker cables

Also, I currently had "normal" DirectTV, but since HD requires more cables, I opted to upgrade now. The way that DirectTV works, you can't simply split cables, so I decided to run the output of the dish to a multiswitch int he basement, and from there, pass the cables upstairs to the TV, and downstairs to the new TVs.

For the cost update, I bought 500' of RG6 cable (about $60) and 500' of Cat5e cable (about $70). Had to purchase a number of wall connectors (suprisingly expensive) and some tools (crimpers, strippers, etc). Total for this cabling about $250. This brings the total now to $5625


Attached are some photos of the enternainment area, which has a number of these cables. Also, the exercise room, which has the video cables running near the top of the room, so i can mount a TV on the wall. The other picture shows the DirectTV multiswitch.


Electric

At this point (April-May 2006 timeframe), I'm getting excited -- The walls are up and we can start to see the basement taking form.

The next stage was the electric work. looking forward to this stage, since I understand wiring the most. The first step was to plan out all the circuits that I need for the basement. Generally, tried to put lights on separate circuits than the outlets. The requirements that I had from the code were:
  • bathroom outlet GFI, dedicated 20amp
  • any outlets around water had to be GFI
  • Also was a requirement for spacing the outlets
With that, first just went around hammering in outlet boxes everywhere I thought i would need an outlet. I put an extra one in the TV/entertainment area. Also, but one up near the ceiling where I would put the wall-mounted TV for the workout room I had one run for lights in the bar/ping-pong area, another for the TV room. I also put one two-way string of lights down the soffit run, just under the bar area. I ended up with a total of 10 planned runs. For the lights, I just used the 5" recessed lights (a total of 21), though in one area, there wasn't room for a recessed due to the pipes/ducts, so will put in a simple fixture. By the external door, I chose to put a sconce light for a little diversity.

Most of the electric work was pretty easy, just drilling holes, running wires. Thanks to my friends Lindsay and Jason who took off one Monday to come by and help (mixed in with some ping-pong). I had finished the electric work by about late June.

Since I was a little unsure of how to attach the runs to the circuit panel, I had an electrician do this (along with a couple of other things). After seeing him do it, I wish I woudl have done it myself, it was pretty easy. As for the cost of the supplies, I didn't keep an exact cost. But, I went through about 3 250' runs of 14 gage wire, and 1 250' spool of 12' wire (didn't use half of it, but it was still cheaper than having to get multiple 50' spools). I had to purchase some tools, as well as the recessed lighting (about $300 for these). i also purchased a sconce light, and the under-cabinet lights. i would estimate about $900 in electric supplies. The contractor charge $300 for the work hooking up the circuits. This brings the total at this point to: $5375


Below are some pictures of some of the wired areas:


Thursday, August 10, 2006

Soffits

Now I was ready to build the soffits. These are the box structures that surround the pipes, ducts, and beams that portrude from the ceiling. Some sources recommend creating 2x4 frames which resemble ladders, and affixing them to the side. I chose the method that uses OSB board (rough boards made from compressed wood chips) as the side panels. This was easier to construct, and also easier to hang.

I had some help from my brother-in-law in constructing the soffits around the entrance to the storage room, and in the bathroom. I had some additional help from Mike and Steve (who stopped by one night becuase they coulnd't get a tennis court) in the main soffit down the middle of the rec-room. All told, the soffit work was easier than I expected. After i finished the soffit, I could then make the half wall (which connected to a pole with penetrated the soffit). The pictures below show the framed soffit and half-wall. Note, these pictures are taken AFTER I put in the electric


Wednesday, August 09, 2006

Inspection and Circuit Panel

Inspections
At this stage, had first round of inspections -- for the rough-in plumbin, and for the mechanical. Mechanical passed fine , but there were a few issues with plumbing -- 1) I hadn't done the soffit framing yet, and he wouldn't pass me until the pipes were encased -- i thought he woudl need to view them, that's why i didn't enclose them yet 2) the shower /seat structure was gonna be too close to the toilet (under the 15" code requirement) and 3) the drain CleanOut for the bathroom sink was behind the new location of the bathroom sink, this had to be moved

The main reason for hte bathroom problems were that the rough-ins put in by the builder, were designed for a smaller bathroom, with a tub-shower. I designed the bathroom to be a little larger, and with a shower only. the tub-shower is 30" wide, while the shower is 36" wide, thus moving it too close to the toilet. So, to pass, I:
  • Finished the soffit work (next blog entry)
  • had Ricky&CO come out and move the toilet draing 6" (needed jackhammer, etc)
  • had Ricky&CO come out and re-route the drain so there was a new CleanOut, now in the exercise room
With those changes, i was able to pass the plumbing rough-in. Ricky only charge $200 for the additional plumbing mods (I also had him move over the bar sink, I changed my mind on where I wanted it to go). As a side Note, Loudoun County has a large number of inspectiosn I need to pass -- plumbing rough-in, mechanical, electrical pre-framing, framing, insulation, post-framing electrical, post-framing plumbing -- And each have their own inspectors (electric, building, plumbing, mechanical)

Cicruit Panel
In the house we live, the main circuit panel is in the garage. Since there is nothing directly below the garage (slab), it would be difficult to run all the electric homeruns up to that panel. So, I decided to get a sub-panel installed in the basement. I had a contractor put that in. It was a bit of a pain to run the primary cable up to the garage, and down in the basement, but he got it done. The picture below shows the finished panel, with the electric circuits already connected (will cover this in a future entry). Total charge for this was $800

So, total cost now:


Moving Drain/Framing around HVAC (Contractor)$900
Framing Lumber$850
Framing Tools $625
Plumbing / Mechanical (Contractor) $1800
Plumbing Rough Supplies $200
Sub Panel (contractor) $800
Total$5175


Monday, August 07, 2006

Mechanical and Plumbing

As of march-april, I had copleted the majority of the framing -- all of the outer walls had been complete, as well as the inner walls for the rooms (bathroom, exercise room, storage room) . The remaining tasks were to create soffits and to create the half-wall between the "rv rooom" area and the ping-pong/bar area.

Soffits are the framed boxes around the piping, ductwork, and steel beams that extruded from the ceiling. The problem was that the ductwork wasn't complete yet. Thus, I before I could complete the framing work, I would need to have the ductwork done.

Ductwork
The new ducts are actually not very difficult to create -- Just cut holes in the existing main vents, run new insulated runs to the duct location, and put the vacuum-cleaner like piece on where the duct will come out. I decided I needed 5 new ducts -- by the outer door, by the bar, in the bathroom, in the exercise room, and by the window in the TV/Rec area. The other ventilation work I needed was a new return air duct, and an exhaust fan/duct for the bathroom. I really didn't want to make the new duct to the outside for the bathroom, so I decided to contract this work out. Again, I was able to Ricky and his crew to do the work.

Plumbing

From the beginning, I had decided not to the plumbing myself, but to hire it out. I was already learning how to do framing/electric/tiling/etc, so figured it'd be good to farm this one out. Since I already had Ricky coming out to do the Ductwork, also had him come out and do the plumbing at the same time. All the framing (minus the soffits) were done, so they could begin. I needed them hook up the following
  • Shower pan
  • Shower
  • Toilet
  • Bathroom sink
  • utility sink
  • bar sink
So, in about 2 days, the guys came out and got all the work done. Total charge was about $1600. Additionally, I had to purchase some rough-in material including the shower pan, the shower hardware and a couple of other things.


So that gives the following:


Moving Drain/Framing around HVAC (Contractor)$900
Framing Lumber$850
Framing Tools $625
Pluming Mechanical (Contractor) $1600
Plubming Rough Supplies $200
Total$4175

The images below show the shower and bar-sink. However, they were taken after I did the electric work, and finished the soffits


Thursday, August 03, 2006

Framing

Ok -- so I have mapped out the design, ordered the lumber, and got the tools.

So starting in about November of '05, I began the framing process. I considered using metal studs instead of the wood, but thought that the wood would be easier to work with, and since the floor joists above weren't exactly straight, getting the exact measurements for the metal studs would be more difficult, while it was easier to trim off the wood studs. The next decision I made was regarding how i contructed the walls. Some sources recommended laying down the bottom plate, nailing up the top plate, and then toe-nailing the studs in between. Other sources recommended constructing the wall on the ground, then standing it up, and attaching it to the floor/ceiling (using shims where necessary). My primary resource (the Remodeling a Basement book) recommended the former method. I ended up choosing this method for a couple reasons: 1) Since I was working primarily by myself, this was easier, since I wuld have needed help standing the wall up 2) it was easier to adjust mistakes this way (and I planned on making plenty) 3) Since the heights were pretty uneven, much easier to cut differnet length studs than try to adjust the wall by using shims.

At first, the going was a little slow, since I was learning as I went. But after about a month, my efficiency went up quite a bit. The process was usually as follows:

  • measure the length of the wall segment I was going to do
  • Cut equal length bottom plate (treated) and top plate (untreated)
  • clamp these together and mark off stud locations on top and bottom of each plate
  • nail in bottom plate using powder acuated nailer, using chalklines as guide
  • if floor joists running parallel to wall, put blocking in between studs every 2 feet or so to use to attach top plate
  • using straight stud and level, mark off locations along ceiling where top plate should go
  • clamp top plate to ceiling
  • use nail gun to attach top plate
  • measure/cut studs for wall segment and fit into wall (snug enough to stand on own, makes it easier to nail)
  • toenail studs using framing nailer

Framing construction proceeded on and off from November until about March. There were some stretches in which I got a bit of work done (I took off a couple days in December) and others where I couldn't work on it for 2-3 weeks. Below are some pictures of the framing before I added any of the other systems (electric, plumbing, mechanical).

During the construction, made a couple changes to the design: switched the "execercise room" with the "storage room", moved where I was gonna put the cabinets, among others. I'll cover the soffit construction in another post, that was a bit of a pain.


Thanks to Steve and Mike who stopped by one night, and the help (of course) of Katie who often came down to help hold up a plate, or help measure stuff.


Wednesday, August 02, 2006

Framing Estimate

Ahh Framing....The first step was getting the material. There were several references for estimating the number of 2x4 studs needed for the framing. I went with the recommended method in the Basement book I previously mentioned. Essentially you need untreated 8' 2x4 studs for the vertical framing. Since it's a basement, and the base of the wall will be directly exposed to concrete, you need to get treated wood. Generally, better to get longer lenghts so that you don't need to fit multiple pieces together. Though, I found that anything longer than 12' was really just unmanageable. Not to mention, the longer the piece of wood, the more likely you'll get some bend. So, i tried to get 12' pieces for the top/bottom where possible, and then use 8' pieces other places.


Estimating, I then came up with:

  • 220 8' studs -- this would cover the veritical studs in the wall, the 8' top plates of the wall
  • 20 treated 8' 2x4s -- needed for the bottom plate of certain wall segments
  • 12 treated 12' 2x4s -- needed for longer run bottom plates
  • 12 untreated 12' 2x4s -- needed for longer run top plates
  • 3 4x8 OSB board -- needed for creating the soffits

I ended up ordering all of this lumber from HomeDepot, and having it delivered -- I wasn't about to haul all of this myself. The downside was that a significant number of these studs were too warped to use. Had i picked my own lumber I could have avoided that, but the time it would have taken to pick through the wood to get this many pieces woudl have been way too long. So, when i came across a piece I could use, I put it to the side. When i built up enough rejects, I took them back to HomeDepot,and exchanged them for hand-picked straing(enough) pieces. I would say about 1 in 3 or 4 pieces was a reject (at least by my standards).

I did end up significantly short though, I would say that i probably had to go back and buy another 30 8' 2x4s. Also, with the soffit work (see my later post about soffits) I went back and purchased a number of 2x3 studs.

So, the overall cost for all the lumber I used was then about $850

Next, a word about tools -- since I was working alone (for the most part), it was unreasonable to just hand-nail all of the pieces. This would have taken a much longer time, and is much harder to hold in place. This nessecitated a framing nailer. Additionally, i needed a mitre saw to make all the cuts. I ended up getting a Porter&Cable framing nailer, and a HomeDepot brand Mitre saw (really just got that one because it had a laser guide, and was cheaper than the other brands). The Gun was $225 and the saw was about $300. Also, i needed a compressor to feed the nail gun. I went with just a small pancake compressor for about $100.

So, to recap cost at this stage:


Moving Drain/Framing around HVAC (Contractor)$900
Framing Lumber$850
Framing Tools $625
Total$2375


Saturday, July 22, 2006

Prelim work

In continuing to recap the basement progress to get to present....

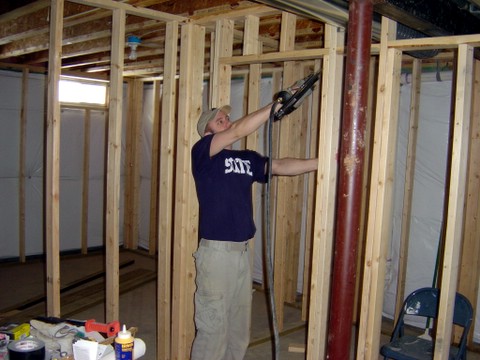
In about november-december I had the initial design done. After doing some reading, I had decided to attempt the following work myself -- framing, electric, hanging doors, finish work, tiling, painting, and cabinet installing. i did want to take a crack (get it , crack?) at dry-walling, but, it seemed like a good task to hire out. I definitely didn't want to try plumbing.

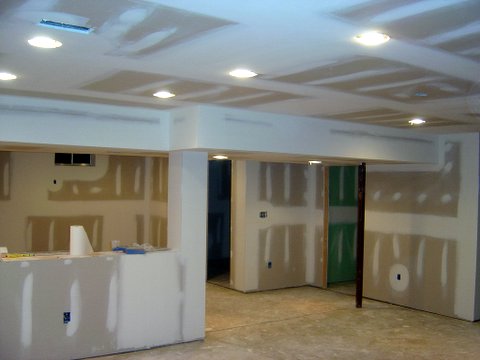
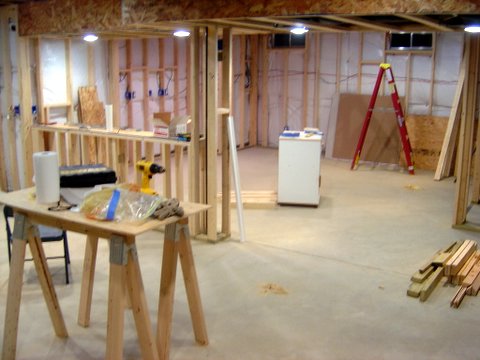
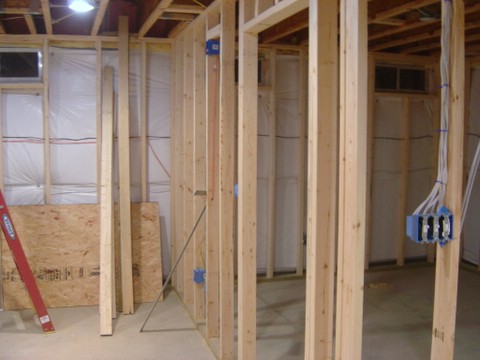
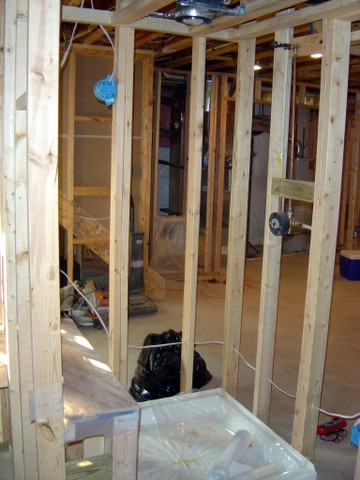
So, at this point, I was anxious to start hammerin'. There were a couple of smaller jobs that I needed to get done first. As per my design, i wanted to have the bar-sink against the wall -- this would allow plenty of room for the pingpong table. however, the drain for the sink was already in the floor, about 7ft away from the outer walll. Clearly this woudln't fit the design, so I needed it to be moved.

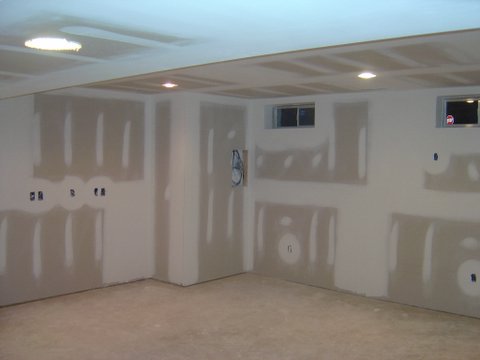
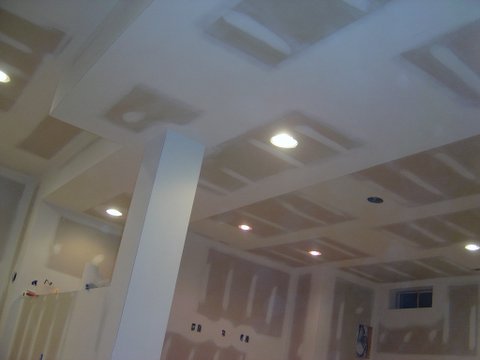
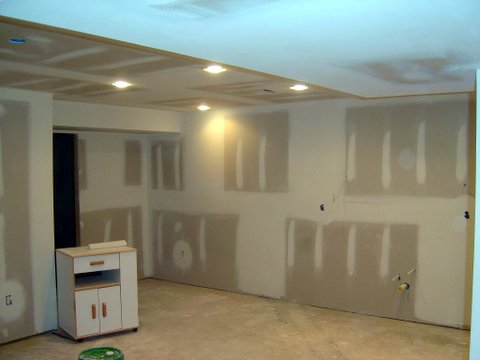
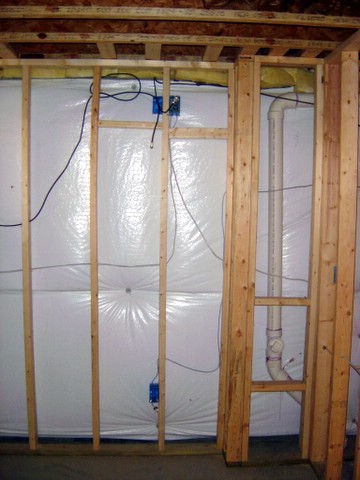
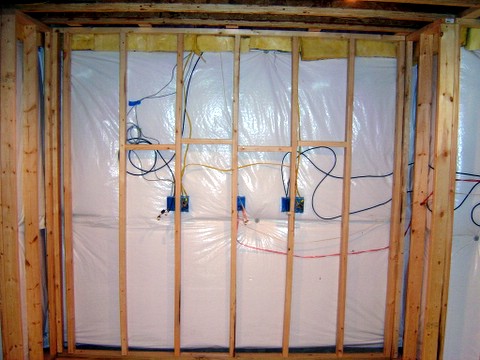
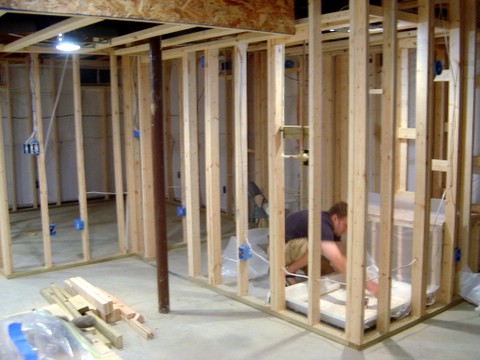
Another problem was the HVAC room. Since the furance and water-heater were located almost directly at the bottom of the stairs (a poor design in my opinion), there was little option on the design. Also, I was forced to have an irregular wall shape (had to make an angled segment).

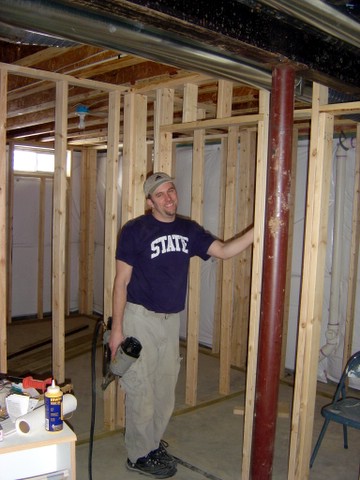
At this point, knew that I needed some contractor help. But most all of the listings/advertisements are for general contractors who want to do the whole job. It's much harder to find contractors to do partial work. Luckily, a friend of mine had finished his basement, and done some of the work himself. So, got the recommendation from him, and talked to his guy -- Ricky. Him, along with others he knew, could cover most of the work that I couldn't. i wouldn't say Ricky was a top-of-the-line contractor, but, he was still exactly what I wanted -- competent and not too expensive.

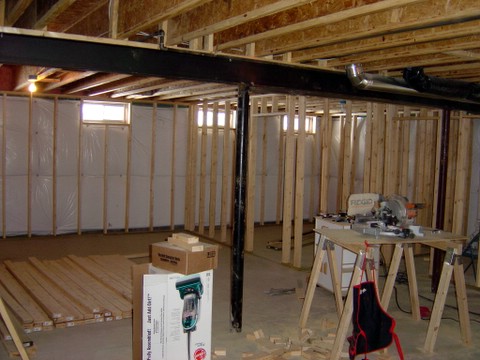
So I had Ricky and his crew come out and 1) move the sink drain from the middle of the room to the wall, and 2) do the framing around the HVAC room. The jack-hammering looked a little tough, but they did a great job (just one day). The total cost of both was only $900.

That brings me to another purpose for this blog, an attempt to capture the total price. Though I kept a general count of the cost, I didn't account for all those little trips to Lowes/homeDepot. The idea is going forward (when I get caught up on this blog) that I'll keep better track of the total price. So, as of this posting, I had spent , you guessed it, $900.